
Let me tell you about the most productive 24 hours I've ever spent.
I was halfway through a bathroom renovation in my own house. I'd just finished tiling the shower wall — 60 sqft of 12×24 porcelain, back-buttered, perfectly leveled, with a 1/8" grout joint. The thinset needed 24 hours to cure before I could grout.
Twenty-four hours. No tiling. No grouting. Just... waiting.
I could have cleaned the workshop. I could have organized my fastener bins. I could have watched three seasons of some show my wife keeps telling me about.
Instead, I walked over to the corner of my garage where I keep my "estate sale projects." Picked up a fly rod I'd bought six months earlier for $15. A 1970s fiberglass 8-weight, 9-foot, two-piece. The cork grip was crumbling. The guides were corroded. The thread wraps were faded and frayed. The blank itself was in good shape — but everything else needed work.
I'd been meaning to restore it for months. I just never had a solid block of time.
Twenty-four hours of curing thinset. That's a solid block of time.
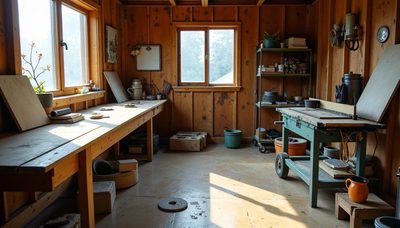
So I sat down at my workbench. I laid out the rod, my tools, and a cup of coffee. And I spent the next 24 hours doing something that felt remarkably like tiling a shower — just with smaller materials and fewer backaches.
The Rod: A 1970s Fenwick Fiberglass
I found this rod at an estate sale in Southeast Portland. The guy who owned it had passed away. His family was selling his fishing gear. They didn't know what they had.
Fenwick fiberglass rods from the 1970s are legendary. They're not the fastest rods — fiberglass is slower than graphite — but they have a feel that modern rods don't. They load deep. They cast with a rhythm. They're forgiving.
This one was an 8-weight, 9-foot, two-piece. Perfect for steelhead on the Deschutes River. Exactly the kind of rod I'd been wanting to try.
The condition:
Blank: Good shape. No dings, no cracks, no soft spots. The fiberglass was intact.
Cork grip: Crumbling. The cork was dry, cracked, and chunks were falling off.
Reel seat: Functional but ugly. The aluminum was tarnished. The locking nut was stiff.
Guides: Corroded. The chrome plating was flaking off. The ceramic inserts were cracked on two guides.
Thread wraps: Faded, frayed, and coming loose. The original finish (varnish) had yellowed and cracked.
Ferrules: Loose. The two sections didn't fit together snugly.
Basically, the rod was a candidate for restoration — or the trash.
I chose restoration.
The 24-Hour Timeline: What I Did and When
Here's how I spent those 24 hours while the thinset cured.
Hour 1: Assessment and Stripping
I laid out the rod on my workbench. I took photos (for the blog). I inspected every guide, every wrap, every inch of the blank.
The stripping process:
Heat gun (low setting) to soften the old varnish on the thread wraps.
Exacto knife to carefully cut the old thread wraps off.
Fine sandpaper (400 grit) to remove the old finish on the blank.
Patience. Lots of patience.
I stripped all the guides off the rod. I removed the old reel seat. I pulled the cork grip off (it basically crumbled in my hands).
The blank was now bare fiberglass — a beautiful golden-brown color. It looked like a different rod.
Hour 3: Cleaning the Blank
Denatured alcohol to remove any remaining adhesive and dirt.
Fine steel wool (0000 grade) to lightly scuff the surface — this helps the new finish adhere.
A clean rag to wipe it down one last time.
The blank was ready. Clean, smooth, and waiting for the next step.
Hour 5: The New Cork Grip
I had a pre-formed cork grip in my parts bin — 10 inches, full wells style (the thicker grip that fills your palm). I'd bought it months ago for another project and never used it.
Reaming the grip:
The cork grip has a hole through the center — but it's undersized. It needs to be reamed to fit the rod blank.
Reaming tool: A tapered rasp that I turned by hand.
Slow and careful: If you ream too much, the grip is loose. If you ream too little, you crack the cork.
Test fit. Ream a little. Test fit again. Repeat.
After about 30 minutes of careful reaming, the grip slid onto the blank with a snug fit — not too tight, not too loose.
Gluing the grip:
Slow-cure epoxy (30-minute working time).
Apply to the blank in a thin, even coat.
Slide the grip on. Rotate it to spread the epoxy evenly.
Wipe off any squeeze-out. Let it cure for 24 hours.
So far, so good. The grip was on. I just had to wait for the epoxy to cure.
Hour 7: The Reel Seat
The old reel seat was corroded and ugly. I replaced it with a new aluminum seat I'd ordered online.
What I used:
Fuji reel seat (black aluminum, locking nut).
Epoxy (the same slow-cure as the grip).
The process:
Clean the blank where the reel seat goes.
Apply epoxy to the blank and to the inside of the reel seat.
Slide the reel seat on. Line it up so the locking nut is on the correct side (for a right-handed caster).
Wipe off squeeze-out. Let it cure.
Now the grip and the reel seat were both on. I had two curing jobs going at once — just like tiling.
Hour 9: The Guides
This is the most tedious part. The rod has about 9 guides (the rings that the line runs through), plus the tip-top guide.
Selecting the guides:
Old guides: Corroded, cracked, useless.
New guides: Fuji aluminum-oxide guides. Lightweight, durable, and affordable.
Spacing the guides:
You need to space them so the line follows the natural curve of the rod when it's flexed.
A standard formula: Space them progressively closer together toward the tip.
For a 9-foot rod: 6-8 guides plus the tip-top, spaced about 6-8 inches apart.
The setup process:
Tape the guides in place temporarily (masking tape).
String the rod with a line to check the spacing.
Adjust the positions until the line follows the curve smoothly.
Hour 12: Wrapping the Guides

This is the part that's most like tiling.
You need to wrap the thread around the blank and the guide foot, securing the guide in place.
The materials:
Thread: Size A (0.006" diameter), nylon, in a dark green color (matching the original).
Thread tension: The thread needs to be tight enough to hold the guide, but not so tight that it cuts into the blank.
Wax: A little wax on the thread helps it hold.
The process:
Start the thread with a loop around the guide foot.
Wrap the thread around the blank and the guide foot — about 10-15 turns on each side of the guide.
Tension: Hold the thread with your finger while wrapping. Keep it even.
Finish: Pull the thread through the loop, trim the ends.
Each guide took about 15 minutes. I had 9 guides + the tip-top = about 2.5 hours of wrapping.
I could have used a thread jig to speed this up. But I like the hand-wrapping process — it's meditative. It's like grouting. Slow, careful, and satisfying.
Hour 15: The Epoxy Finish
After the guides are wrapped, you need to coat the wraps with epoxy.
The purpose:
Protects the thread from UV damage and moisture.
Bonds the wraps to the blank.
Looks beautiful when it's done.
The process:
Mix epoxy (two-part, slow-cure) in a small cup.
Apply with a small brush — exactly like applying grout.
Coat each wrap evenly — not too thick, not too thin.
Rotate the rod on a drying stand to prevent drips.
I built a simple drying stand out of scrap wood — two V-shaped notches to hold the rod while it rotates.
The rod needed to rotate for 12-24 hours while the epoxy cured. That meant I could set it up and walk away — exactly like waiting for thinset to cure.
Hour 16: The Ferrule Fix
The ferrule was loose. The two sections of the rod didn't fit together snugly.
The fix:
Apply a thin coat of clear nail polish to the male ferrule (the part that goes inside).
Let it dry.
Test fit. Too loose? Add another coat. Too tight? Sand it lightly.
It took three coats to get the fit right. The rod sections now fit together snugly — no wobble.
Hour 18: The Final Assembly
The epoxy on the wraps had cured enough to handle.
Reassemble the rod.
Check the alignment of all the guides (they need to be in a straight line).
Check the reel seat — the locking nut turns smoothly.
Check the cork grip — it's solid and comfortable.
The rod was done.
The Connection: Why This Matters to The Square Meter
Fishing and tiling have a lot in common.
Tiling | Fly Rod Restoration | |
|---|---|---|
Patience | Waiting for thinset to cure | Waiting for epoxy to cure |
Precision | Leveling tiles to 1/16" | Aligning guides to 1/16" |
Detail | Grouting with a sponge | Wrapping thread with tension |
Materials | Thinset, grout, tile | Cork, epoxy, thread |
Satisfaction | A perfectly tiled wall | A perfectly cast rod |
The same skills apply:
Patience. You can't rush thinset. You can't rush epoxy.
Precision. A 1/16" grout joint. A guide aligned to 1/16".
Data. The thickness of the thinset. The tension of the thread.
Materials. The right thinset for the tile. The right epoxy for the thread.
The fly rod restoration taught me something that's useful in my day job: the best things are slow.
You can't rush good work. You can't shortcut quality. And the waiting is part of the process.
What I Learned From the Rod

After 24 hours of restoration, I had a rod that cast like a dream.
The blank was beautifully smooth — the old finish had been hiding the color.
The new grip was comfortable — full wells, just the right size.
The new guides were smooth — the line flew through them.
The thread wraps looked clean and professional — if I do say so myself.
But I also learned something about myself:
I like the process. Not just the result — the process of the work.
I'm patient. I can wait for things. I can wait for thinset. I can wait for epoxy. I can wait for a fish to bite.
I'm detail-oriented. I enjoy the fine work. The wrapping. The alignment. The precision.
That's why I do what I do. Not just for the finished floor — but for the process of building it.
The "Would I Do It Again?" Scorecard
Factor | Score (1-10) |
|---|---|
Satisfaction | 10/10 |
Difficulty | 6/10 |
Time investment | 8/10 |
Cost savings | 9/10 (a new rod of this quality would cost $300+) |
Skill gained | 8/10 |
Recommendation | 10/10 |
I'd absolutely do it again.
The "Should You Try This?" Flowchart
Yes, try rod restoration if:
You're patient and comfortable with slow, detailed work
You already have some tools (heat gun, sandpaper, epoxy)
You like learning new skills that don't involve power tools
You have some downtime when your tiling projects are curing
You're in Portland or the PNW and you can actually use the rod
No, don't try rod restoration if:
You're impatient and want instant results
You don't have any workspace to spread out
You have no interest in fly fishing
You're not comfortable with fine detail work
The Bottom Line
A 24-hour wait for thinset to cure is the perfect time to restore a fly rod.
The same skills apply:
Patience
Precision
Detail
Materials
And you get a beautiful rod at the end.
It's not about the rod. It's about the process.
The Fine Print
The rod was purchased at an estate sale for $15. Replacement parts cost about $80 (cork grip, reel seat, guides, thread, epoxy). Total investment: about $95.
A comparable new rod would cost $300-500.
The 24-hour timeline included about 16 hours of active work and 8 hours of curing/waiting.
If you're not a fly fisherman, I'd still recommend trying a similar project — restoring a vintage tool or a piece of furniture while you wait for your tiling project to cure.
The Deschutes River is waiting.
No signals yet — transmit the first.